Alle Beiträge von SiteGefuehl

TYPO3 rte (ckeditor 5) buttons config aus der tsconfig in yaml übertragen

We recommend you to put all configurations for the preset in the YAML configuration. However, it is still possible to override these settings through the page TSconfig.

You can find a list of configuration properties in the Page TSconfig reference, chapter RTE.

Quelle: https://docs.typo3.org/c/typo3/cms-rte-ckeditor/main/en-us/Configuration/Reference.html


Leider habe ich keine Beispiel YAML Konfiguration gefunden, wie man bestehende RTE TSConfig in YAML für den neuen CKEditor ab TYPO4 V12 überträgt. Daher hier eine Beispiel-Konfiguration von mir.

Ziel war es insbesondere einen Link mit Button Klassen aus Bootstrap einzufügen. Mehrere Klassen für einen Link über den Link Wizard einzufügen gab es leider erst ab TYPO3 7 über TSConfig. Diese Config hatte bei mir nicht mehr funktioniert. Mit der u.g. YAML Konfiguration kann ich einem Link direkt zwei Button Klassen geben „btn btn-secondary-cta“ und diesen sogar im Link Wizard benutzerfreundlich bennenn.


imports:
    - { resource: "EXT:my_base_sitepackage/Configuration/RTE/my_general.yaml" }

editor:
    config:
        contentsCss:
            - 'EXT:my_sitepackage/Resources/Public/CSS/rte.min.css'
        style:
          definitions:
            - { name: "Lead Text", element: "p", classes: ['lead'] }
            - { name: "Colored Box", element: "p", classes: ['bgcolor-green', 'p-3', 'rounded-corners-1'] }
            - { name: "White Box", element: "p", classes: ['bg-white', 'p-3', 'rounded-corners-1'] }
            - { name: "Checklist", element: "ul", classes: ['checklist'] }
            - { name: "Link Download", element: "a", classes: [ 'link-download' ] }
            - { name: "Link Related", element: "a", classes: [ 'link-related' ] }
            - { name: "Primary CTA", element: "a", classes: [ 'btn' , 'btn-primary-cta'] }
            - { name: "Secondary CTA", element: "a", classes: [ 'btn' , 'btn-secondary-cta'] }

        format_tags: "p;h2;h3;h4;h5;h6"

buttons:
    link:
        properties:
            class:
                allowedClasses: 'link-download, link-related, btn btn-primary-cta, btn btn-secondary-cta'
classes:
    link-download:
        name: 'Link Download'
    link-related:
        name: 'Link Related'
    btn btn-primary-cta:
        name: 'Primary CTA'
    btn btn-secondary-cta:
        name: 'Secondary CTA'


WordPress OHNE Multisite im Hauptverzeichnis UND im Unterverzeichnis installieren

  1. WordPress im Hauptverzeichnis installieren (document root vom hoster oder der Ordner, der als Ziel einer domain.de angegeben wurde).
  2. WordPress im Unterordner installieren zB domain.de/kurse/
  3. kurse darf es als Seite oder Blog Artikel nicht auf der Website aus dem Hauptverzeichnis existieren.
  4. .htaccess Datei aus dem Unterverzeichnis öffnen und die Zeile

RewriteRule . /index.php [L] ändern in 
RewriteRule . /kurse/index.php [L]
 

Nun haben wir zwei WordPress Installationen. Eine unter domain.de und eine unter domain.de/kurse

Das macht dann Sinn, wenn die technische Grundlage ganz unterschiedlich ist oder sein soll.


Wünschen Sie eine Beratung oder Schulung ? Ich helfe gerne. Mailen Sie mir: info [ät] sitegefuehl [punkt] de

TYPO3 Inhaltsverzeichnis (Section Index) mit Gridelements

Das Inhaltsverzeichnis (Content Element: Menu Section Index) funktioniert ohne Eingreifen leider nicht mit der Extension Gridelements. Hierfür bitte folgenden ViewHelper benutzen:


<?php
namespace [DEINNAMESPACE];

/**
 * @author 2020 Paulina Seroczynska <ps [ät] sitegefuehl [punkt] de>
 * The original Menu\SectionViewHelper from fluid_styled_content was used and modified
 */

/*
 *
 * This file is part of the TYPO3 CMS project.
 *
 * It is free software; you can redistribute it and/or modify it under
 * the terms of the GNU General Public License, either version 2
 * of the License, or any later version.
 *
 * For the full copyright and license information, please read the
 * LICENSE.txt file that was distributed with this source code.
 *
 * The TYPO3 project - inspiring people to share!
 */

use TYPO3\CMS\Fluid\Core\ViewHelper\AbstractViewHelper;

/**
 * A view helper which returns content elements with 'Show in Section Menus' enabled
 *
 * By default only content in colPos=0 will be found. This can be overruled by using "column"
 *
 * If you set property "type" to 'all', then the 'Show in Section Menus' checkbox is not considered
 * and all content elements are selected.
 *
 * If the property "type" is 'header' then only content elements with a visible header layout
 * (and a non-empty 'header' field!) are selected.
 * In other words, if the header layout of an element is set to 'Hidden' then the element will not be in the results.
 *
 * = Example =
 *
 * <code title="Content elements in page with uid = 1 and 'Show in Section Menu's' enabled">
 * <ce:menu.section pageUid="1" as="contentElements">
 *   <f:for each="{contentElements}" as="contentElement">
 *     {contentElement.header}
 *   </f:for>
 * </ce:menu.section>
 * </code>
 *
 * <output>
 * Content element 1 in page with uid = 1 and "Show in section menu's" enabled
 * Content element 2 in page with uid = 1 and "Show in section menu's" enabled
 * Content element 3 in page with uid = 1 and "Show in section menu's" enabled
 * </output>
 */
class SectionViewHelper extends AbstractViewHelper
{
    use \TYPO3\CMS\FluidStyledContent\ViewHelpers\Menu\MenuViewHelperTrait;

    /**
     * Initialize ViewHelper arguments
     *
     * @return void
     */
    public function initializeArguments()
    {
        $this->registerArgument('as', 'string', 'Name of the template variable that will contain selected pages', true);
        $this->registerArgument('column', 'integer', 'Column number (colPos) from which to select content', false, null);
        $this->registerArgument('pageUid', 'integer', 'UID of page containing section-objects; defaults to current page', false, null);
        $this->registerArgument('type', 'string', 'Search method when selecting indices from page', false, '');
    }

    /**
     * Render the view helper
     *
     * @return string
     */
    public function render()
    {
        $as = (string)$this->arguments['as'];
        $pageUid = (int)$this->arguments['pageUid'];
        $type = (string)$this->arguments['type'];

        if (empty($pageUid)) {
            $pageUid = $this->getTypoScriptFrontendController()->id;
        }

        if (!empty($type) &amp;amp;&amp;amp; !in_array($type, array('all', 'header'), true)) {
            return '';
        }

        return $this->renderChildrenWithVariables(array(
            $as => $this->findBySection($pageUid, $type, $this->arguments['column'])
        ));
    }

    /**
     * Find content with 'Show in Section Menus' enabled in a page
     *
     * By default only content in colPos=0 will be found. This can be overruled by using $column
     *
     * If you set property type to "all", then the 'Show in Section Menus' checkbox is not considered
     * and all content elements are selected.
     *
     * If the property $type is 'header' then only content elements with a visible header layout
     * (and a non-empty 'header' field!) is selected.
     * In other words, if the header layout of an element is set to 'Hidden' then the page will not appear in the menu.
     *
     * @param int $pageUid The page uid
     * @param string $type Search method
     * @param int $column Restrict content by the column number
     * @return array
     */
    protected function findBySection($pageUid, $type = '', $column = null)
    {
        $constraints = array(
        );
        if ($column !== null) {
            $constraints[] = 'tt_content.colPos = ' . (int)$column;
        }

        switch ($type) {
            case 'all':
                break;
            case 'header':
                $constraints[] = 'tt_content.sectionIndex = 1';
                $constraints[] = 'tt_content.header <> \'\'';
                $constraints[] = 'tt_content.header_layout <> 100';
                break;
            default:
                $constraints[] = 'tt_content.sectionIndex = 1';
                $constraints[] = 'tt_content.header <> \'\'';
        }
        //$constraints[] = 't2.uid IS NULL OR (t2.deleted = 0 AND t2.hidden = 0)';

        $whereStatement = implode(' AND ', $constraints);

        $contentElements = $this->getTypoScriptFrontendController()->cObj->getRecords('tt_content', [
            'selectFields' => 'tt_content.header, tt_content.sorting as original, ((IFNULL(t2.sorting, tt_content.sorting) * 10000) + tt_content.sorting)  as sorting',
            'leftjoin' => 'tt_content t2 on t2.uid = tt_content.tx_gridelements_container ',
            'where' => $whereStatement,
            'orderBy' => 'sorting asc',
            'languageField = sys_language_uid',
            'pidInList' => (int)$pageUid
        ]);

        return $contentElements;
    }
}

Fancybox 3 und der Pin It (Merken) Button von Pinterest

Ihr habt bereits Fancybox 3 (komplett responsive und touchfähig) im Einsatz und möchtet den Pin It Button einfügen? Solange ihr auf eurer Seite nur Thumbnails einbindet und die großen Bilder erst in der Lightbox geladen werden, sollten eure Nutzer die Möglichkeit in der Fancybox erhalten eure Bilder zu pinnen.

Und so geht’s:

Schritt 1:

Füge das JavaScript vor dem schließenden body Tag ein.

<script async defer src="//assets.pinterest.com/js/pinit.js"></script>

Schritt 2:

Danach fügt ihr Fancybox laut dieser Anleitung ein. 

Schritt 3:

Ich füge den Pin It Button in die Beschreibung des Bildes ein. Ist eine Beschreibung vorhanden, wird diese erweitert.

Dazu habe ich folgenden Code geschrieben:


$(".fancybox").fancybox({
		caption : function( instance, item ) {
			var caption, link;

			if ( item.type === 'image' ) {
				var caption = $(this).data('caption');
				
				if (caption) {
					//set description to current title
					//this will set what posts
					var description = $(this).data('caption');
					//add pinterest button for title
					pin = '<a data-pin-do="buttonPin" data-pin-tall="true" data-pin-save="false" href="https://pinterest.com/pin/create/button/?url=' +
					encodeURIComponent(document.location.href) +
					'&amp;amp;amp;media=' +
					//put the path to the image you want to share here
					encodeURIComponent(this.href) +
					'&amp;amp;amp;description=' + description + '"><img src="/fileadmin/templates/img/pinterest.png" /></a>'
					//add title information
					+ '&amp;amp;amp;nbsp;<span>' + $(this).data('caption') + '</span>';
					return pin;
				} else {
					//add pinterest button for title
					caption = '<a data-pin-do="buttonPin" data-pin-tall="true" data-pin-save="false" href="https://pinterest.com/pin/create/button/?url=' + 
					encodeURIComponent(document.location.href) +
					'&amp;amp;amp;media=' +
					encodeURIComponent(this.href) +
					'&amp;amp;amp;description=Pin%20von%20finca-ferienhaus.de%20Ferienh%C3%A4user%20und%20Fincas%20auf%20Mallorca"><img src="/fileadmin/templates/img/pinterest.png" /></a>';
					return caption;
				}

				
			}
		}
		
	});


Dieser muss natürlich in euren document ready Aufruf.

$(document).ready(function () { hier den oben gennanten Code einfügen });

Die Standard Beschreibung des Pins müsst ihr natürlich gegen die Beschreibung eurer Website austauschen. Außerdem habe ich mir einen eigenen Button erstellt.

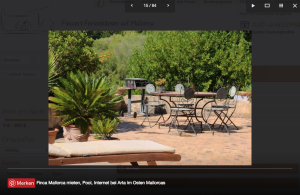
Und so sieht es dann aus:

Fancybox 3 mit einem Pinterest Button

Ausgabe eines Bildes (FAL) aus einer bestimmten Seite aus tt_content (ctype image oder textpic)

Mein Ziel war es von Fluid heraus die uid einer Seite an TypoScript zu übergeben


<f:cObject typoscriptObjectPath="lib.caseStudyImage" data="{casestudy}" />


Jedes Object casestudy hatte eine UID, die die uid einer Seite war. Es wurden über eine foreach Schleife mehrere Case Studys ausgegeben. Bei der Ausgabe dieser Case Studys sollte dann aus dem Inhalt der jeweiligen Seite das erste Bild ausgegeben werden.

Leider hat kein einziger Code, den ich im Netz gefunden habe korrekt mit FAL funktioniert. Daher hier meine Lösung


lib.caseStudyImage = CONTENT
lib.caseStudyImage {
	table = tt_content
	select {
		languageField = sys_language_uid
		orderBy = sorting
		max = 1
		where = (CType = "image" OR CType = "textpic") AND colPos = 0 
		pidInList.field = uid
	}
	renderObj = FILES
	renderObj {
		begin = 0
		maxItems = 1
		references {
			table = tt_content
			uid.data = uid
			fieldName = image
		}
		renderObj = IMAGE
		renderObj {
			file.import.data = file:current:uid
			file.treatIdAsReference = 1
			file.width = 335c
			file.height = 220c
			altText.data = file:current:title
		}
	}
}

tx_news Kategorie und Kategoriebeschreibung ausgeben

et voila


temp.categorymenu = COA
temp.categorymenu.20 = CONTENT	
temp.categorymenu.20 {
	table = tx_news_domain_model_category
	select {
		selectFields = tx_news_domain_model_category.title, tx_news_domain_model_category.description
		pidInList = {$storage}
		join = tx_news_domain_model_news_category_mm ON (tx_news_domain_model_category.uid = tx_news_domain_model_news_category_mm.uid_foreign) INNER JOIN tx_news_domain_model_news ON (tx_news_domain_model_news.uid = tx_news_domain_model_news_category_mm.uid_local)
		andWhere = tx_news_domain_model_news.uid = {GP:tx_news_pi1|news}
		andWhere.insertData = 1
		max = 1
	}
	renderObj = COA
	renderObj {
		10 = TEXT
		10 {
			field= title
			wrap = <h2>|</h2>
			htmlSpecialChars = 1
		}
		20 = TEXT
		20 {
			field= description
			wrap = <p>|</p>
			htmlSpecialChars = 1
		}
	}
}

TYPO3 Swift_RfcComplianceException

Wenn es mal wieder heißt

Address in mailbox given [@localhost] does not comply with RFC 2822, 3.6.2.
Swift_RfcComplianceException thrown in file [..]/MailboxHeader.php in line 309.

.. dann wird vermutlich in einer alten Extension noch die alte Mail API von TYPO3 genutzt.
Ich glaube sogar direct_mail hatte bei mir auch irgendwann den Fehler verursacht.
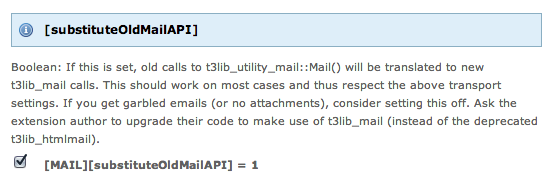
Da reichte es, wenn man im Install Tool folgende Einstellung aktivierte (substituteOldMailAPI).

Oder vielleicht liegt der Wurm auch im falschen Headers Bereich, der Mail. Siehe Bug 25295 im Forge.

Bei mir lies sich das Problem folgendermaßen lösen:
Schauen, welcher Code ausgeführt wird, wenn der Fehler auftritt. Es wird vermutlich ein Absenden eines Formulars sein, oder Ähnliches. Ich musste im Code der Extension dann nur noch nach den Stellen suchen, wo eine Email versendet wird.

Bei mir sah die Funktion folgendermaßen aus:
t3lib_div :: plainMailEncoded('', $subject, $message, $headers);

Die habe ich dann ersetzt durch die neue Mail API:

$mail = t3lib_div::makeInstance('t3lib_mail_message');
$mail->setFrom(array($email => $name));
$mail->setTo(array($email => $name));
$mail->setSubject($subject);
$mail->setBody($body);
$mail->send();

Mehr Infos zum SwiftMailer findet ihr auf Forge.

font-face ueber verschiedene Domains und https (SSL) im IE9 und Firefox

Tatsächlich ist bisher der Fehler nie aufgefallen. Erst jetzt! Da ich recht lange recherchieren musste, um eine Lösung zu finden, nehme ich das mal als Grund über das Problem in meinem Blog zu schreiben.

Ich hatte folgende Konstellation: Eine WordPress Instanz sollte über mehrere Domains erreichbar sein. In diesem Fall war es einmal die Hauptdomain www.xyz.de und die Subdomains namens stadt1.xyz.de + stadt2.xyz.de + stadt3.xyz.de + stadt4.xyz.de

Je nach Domain wurde ein anderer Inhalt ausgegeben. Dies habe ich mit einer kleinen HTTP Host Abfrage in WordPress gelöst.

Nun sollten auch Webfonts über font-face und auch die komplette Website über https laufen. Ich habe hier ein nettes, schlankes Plugin gefunden, welche alle Links (auch in der CSS Datei) zum Protokoll https zwingt (WordPress HTTPS war mir zu viel des Guten). So wird schonmal keine Info über unsichere Inhalte ausgegeben. Das Plugin nimmt einem die Arbeit ab, alle Inhalte und Plugins nach http Verbindungen abzusuchen.

Folgender Fehler trat nun auf: Besuchte man eine der Subdomains über den Firefox (bei mir war’s noch die Version 15) und dem IE9, so wurden die Webfonts nicht geladen. Ich probierte absolute Pfad, z.B. https://www.xyz.de/font.eot oder //font.eot oder /font.eot aus. Relative Pfade brachten leider auch nicht das gewünschte Ergebnis. Lustigerweise sah im Chrome auf den Subdomains alles super aus. Die Hauptdomain war auch in allen Browsern ok.

Nach einiger Zeit Recherche und nachdem ich die Web-Konsole über den Firefox öffnete, sah ich den Fehler:

Firefox meckerte aufgrund eines Cross-Domain Problems. Er versuchte nämlich weiterhin über die Hauptdomain die Fonts aufzurufen. Da man sich jedoch auf der Subdomain befand, wurden diese nicht aufgerufen.

Ich habe nun folgende Einstellungen in die .htaccess eingefügt:


AddType application/vnd.ms-fontobject .eot
AddType font/ttf .ttf
AddType font/otf .otf
AddType font/woff .woff

<FilesMatch "\.(ttf|otf|eot|woff)$">
<IfModule mod_headers.c>
Header set Access-Control-Allow-Origin "*"
</IfModule>
</FilesMatch>

Die AddType Zeilen fügen die MIME types zur HTTP response hinzu. Danach prüfen wir, ob eine der Dateiendungen abgerufen wird und ob mod_headers vorhanden ist und erlauben den Zugriff über andere Domains.

Das Ganze kann man auch die Apache Config (z.B. hier zu finden /etc/apache2/apache2.conf ) schreiben.

Folgendermaßen sieht nun meine font-face CSS Bereich aus:


@font-face {
    font-family: "Font XY";
	src: url('https://www.xyz.de/wp-content/themes/xyz/fonts/Font-XY.eot'); 
	src: url('/wp-content/themes/xyz/fonts/Font-XY.woff') format('woff');
	font-weight: normal;
	font-style:normal;
}

Anzahl Kommentare in der tt_news SINGLE Ansicht (Ext: comments in TYPO3)

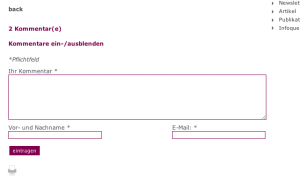
Endergebnis: Anzahl Kommentare in der SINGLE Ansicht
Ihr benutzt tt_news und die comments Extensions? Komischerweise ist die Ausgabe der Anzahl der Kommentare nur in der LIST, LATEST und SEARCH Ansicht möglich. Was müsst ihr machen, um die Anzahl der Kommentare auch in der SINGLE Ansicht anzeigen zu lassen? Leider in die Extension eingreifen!

Dort wird die Art des tt_news Views über Strings abgefragt. In der Funktion extraItemMarkerProcessor (ca ab Zeile 64) in der Datei class.tx_comments_ttnews.php unter typo3conf/ext/comments/.

In dieser Funktion werden die Marker mit Inhalt befüllt.
Vorher wird über Switch abgefragt in welchem tt_news View ihr euch befindet.

Hier muss SINGLE hinzugefügt werden. Also muss euer Code so aussehen:


	function extraItemMarkerProcessor($markerArray, $row, $lConf, &amp;amp;amp;$pObj) {
		/* @var $pObj tx_ttnews */
		switch ($pObj->theCode) {
			case 'LATEST':
			case 'LIST':
			case 'SEARCH':
			case 'SINGLE':
				// Add marker for number of comments
				$commentCount = $this->getNumberOfComments($row['uid'], $pObj);
				$templateName = $commentCount ? '###TTNEWS_COMMENT_COUNT_SUB###' : '###TTNEWS_COMMENT_NONE_SUB###';
				if (($template = $this->getTemplate($templateName, $lConf, $pObj))) {
					$lang = t3lib_div::makeInstance('language');
					/* @var $lang language */
					$lang->init($GLOBALS['TSFE']->lang);
					$markerArray['###TX_COMMENTS_COUNT###'] = $pObj->cObj->substituteMarkerArray(
						$template, array(
							'###COMMENTS_COUNT_NUMBER###' => $commentCount,
							'###COMMENTS_COUNT###' => sprintf($lang->sL('LLL:EXT:comments/locallang_hooks.xml:comments_number'), $commentCount),
							'###COMMENTS_COUNT_NONE###' => $lang->sL('LLL:EXT:comments/locallang_hooks.xml:comments_number_none'),
							'###UID###' => $row['uid'],
							'###COMMENTS_LINK###' => $this->getItemLink($markerArray['###LINK_ITEM###'], $row['uid'], $pObj),
						)
					);
					unset($lang);	// Free memory explicitely!
				}
				break;
		}
		return $markerArray;
	}

Natürlich muss auch der Marker ###TX_COMMENTS_COUNT### in euer tt_news SINGLE Template eingefügt werden.